Frequently asked questions and Support
- How do I sign up?
- How much is a subscription?
- How do I open a project?
- How do I upload a project file?
- How can I group the activities?
- How can I filter the activities?
- What can I do on the activity details page?
- I can add pictures and documents?
- How do I export the xer back to P6?
- How do I cancel my subscription?
How do I sign up?
When you arrive at the home page via the website or app, you’ll need to sign-up to get an account. We want to verify you have a real email account so we can help you get familiar with SiteWalker and notified of product updates. (Of course you can unsubscribe!)
How much is a subscription?
FREE. That includes all the functionality we’ve released to date. Eventually, we plan to segment the subscriptions with a “USER” level, that only provides access to view and update, and a “PRO” that would allow import/export of schedule files.
We have other add-ins up our sleeves that could be released later, but for now, we’re trying to keep it simple!
How do I open a project?
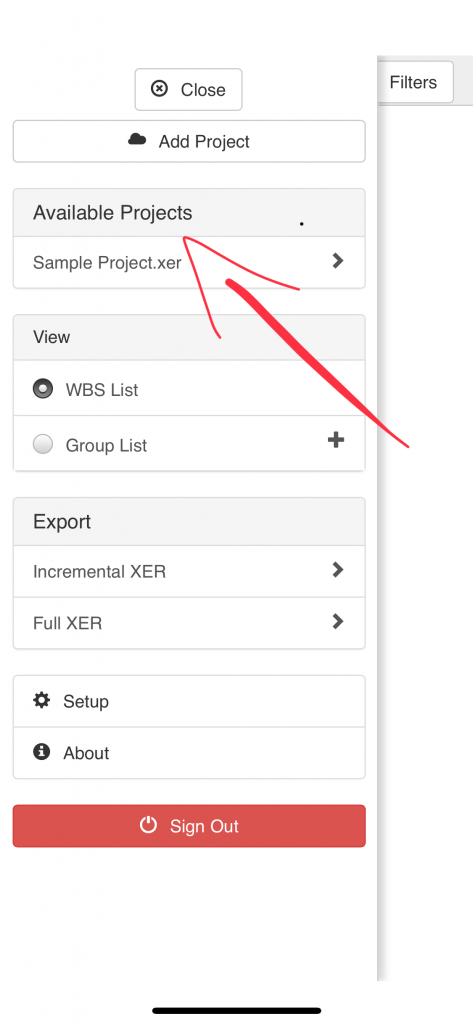
We’ve provided a sample project that we have been using for development for the past couple years. Go to the left menu, and select “Sample Project.xer”.
How do I upload a project file?
First, make sure you’ve signed up. If you haven’t signed up, you can only view the sample file.
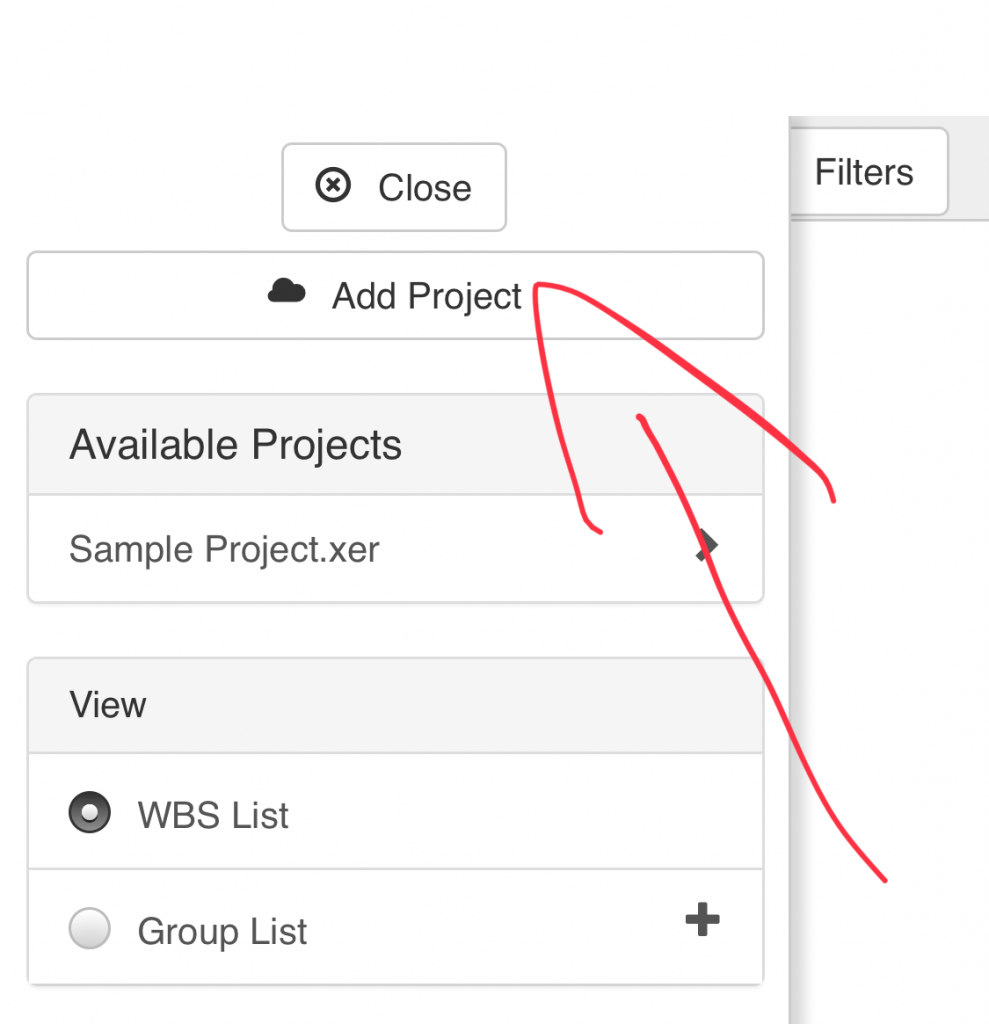
Export your file from P6 as an “.xer” file. In SiteWalker, go to the Settings menu on the left, and add a project.
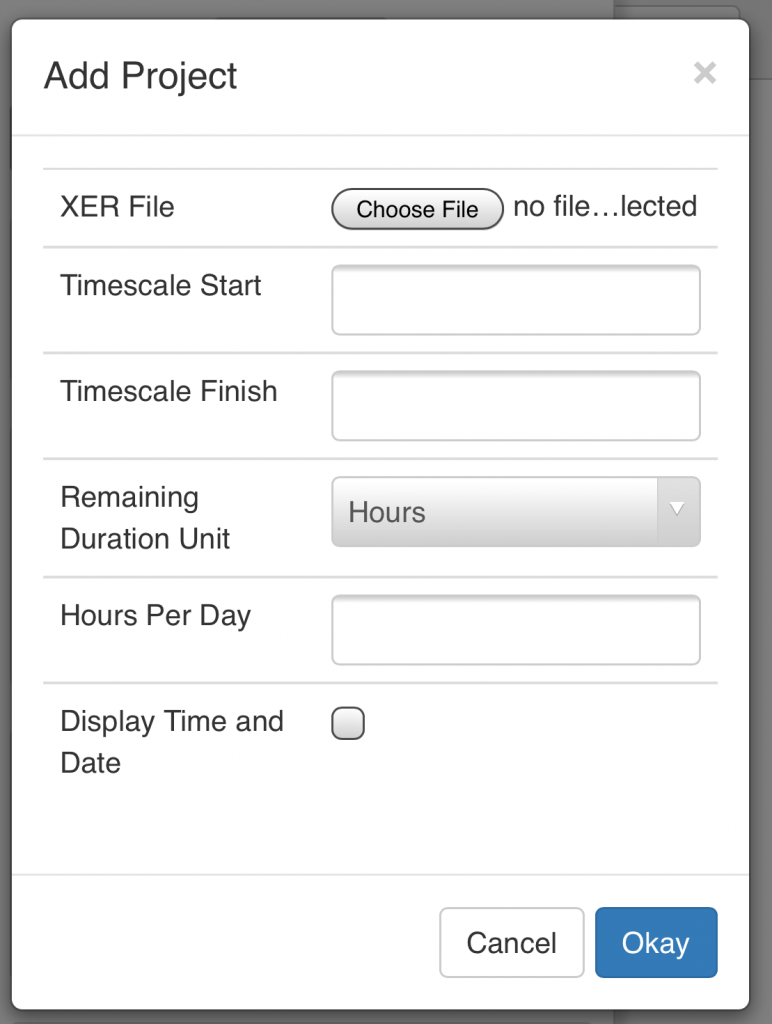
 Select your .xer file, and upload it. The timescale for the Gantt bars is set up here. Also, enter the project’s hours per day (usually 8 or 10) and whether you’d like durations displayed in hours or days.
How can I group the activities?
By default, we group projects by WBS. If you’ve assigned activity codes in P6, those are available under “Group List”. Also, under the “Group List”, you can group by Date, Float, or Resource.
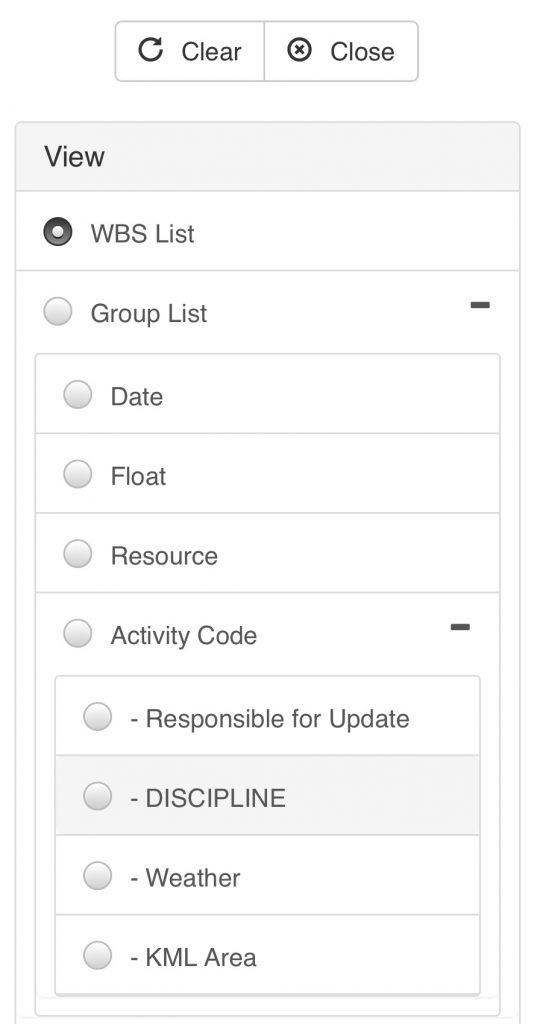 The Date and Resource grouping works a little bit different than the activity groups in P6. Resources work like the Resource assignment page, in that, if an activity has multiple resources assigned to it, you’ll see the activity under each resource. With the dates, if the activity spans multiple weeks, it will show up under each week that is is planned for.
How can I filter the activities?
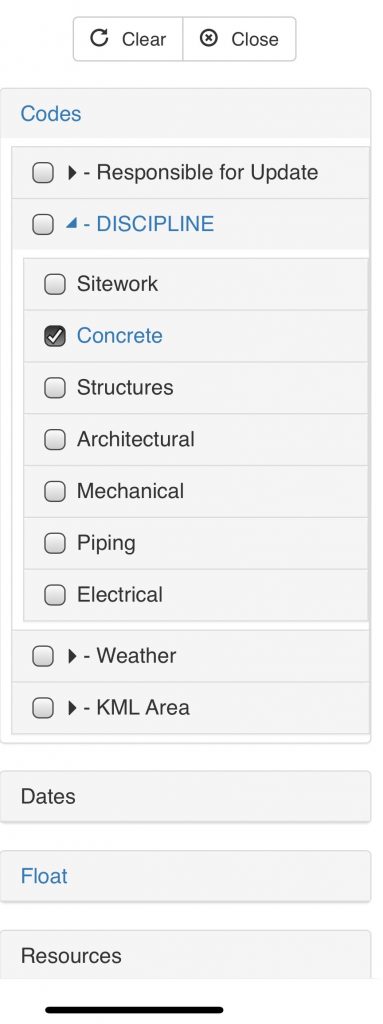
In the top right corner of the activities list, there is a “Filters” button. Under that, you’ll find the option to search for activities by:
- Name/ID
- Status
- Codes (Activity Codes)
- Date Range
- Float
- Resources
- Photos
- Changed
The activity details page has enough to be dangerous, but not enough to smother you in details. Most importantly, it has the name, dates, and float. If you add a picture, it appears here. You can change the dates to represent actual dates (check the started/finish box) or planned dates. If the finish date of a started activity is changed, the finish date becomes the expected finish.
Under that, tabs show other details that aren’t available in a printed pdf. You can see resources, predecessors, successors, and activity codes. If you have some comments to add, you can enter them in the Notes field, in the appropriate Note Type.
Don’t forget to “Update Progress” before you navigate away!
Yes. You can actually add pictures directly from the mobile device you are working on. If you’re on a desktop, you can drag and drop multiple pictures or pdf documents (drawings!?!).
When you get back to P6, they come in under Work Products and Documents. Work Products and Documents can be assigned to multiple activities in P6.
To import your changes back into P6, go to the settings menu and export the Incremental xer. Confirm your email, then follow the link sent to it. The link will download a special xer file, that only contains the changes made within SiteWalker.
Open P6, and import an xer. Choose the update function and select the project to import it back into.

